


Christmas is coming, and hosting often brings with it a long list of things to plan, prep, and time just right. A Christmas tree cheese board fits neatly into this moment because it asks very little while offering plenty in return. It comes together quickly, leaves room for personal expression, and turns arranging food into a creative outlet rather than another task on the list. This board works perfectly for both kids and adults. Children gravitate towards fruit, crackers, and milder cheeses, while adults linger over sharper flavours and a glass of wine. The tree shape adds a festive cue without needing extra decoration, which makes it feel right at home on a Christmas table, sideboard, or coffee table where people naturally gather and snack as the evening unfolds.
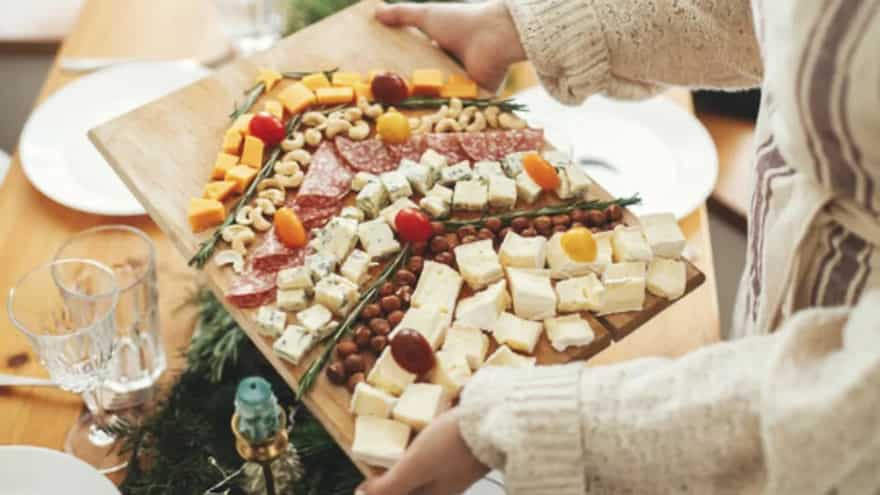
Image credit: Adobe Stock
How To Build A Christmas Tree Cheese Board At Home
Start with the base.
Choose a flat surface large enough to clearly hold a triangular shape. A wide wooden board works well, though a tray, slate, or a table lined neatly with parchment paper works just as smoothly. Visualise the tree before you begin, with the widest part at the bottom and a gradual taper as it moves upward. Keeping this mental outline in mind helps every element fall into place without constant adjustment.
Lay down the cheeses first.
Cheese sets both the structure and the outline of the tree. Use a small mix of textures rather than many varieties. A firm cheese such as cheddar or gouda helps create clean edges. A soft cheese like brie or camembert adds contrast in shape and surface. A crumbly or blue cheese introduces visual interest. Place larger wedges and blocks along the outer edges first to define the triangular silhouette. Once the outline feels clear, fill the centre with sliced and broken pieces, working from the base upward so the tree narrows naturally.
Build branch-like layers with savoury elements.
After the cheese is in place, add crackers, breadsticks, and crostini to create a layered look. Arrange them in short horizontal runs that grow shorter as you move upward, echoing the idea of branches. Angling them slightly upward helps guide the eye along the tree shape. Olives, roasted nuts, and cornichons fit neatly into gaps and corners, adding texture while keeping the surface visually active.
Add colour using seasonal fruits and ornament-style accents.
This stage brings the festive look together. Use fruits commonly available in markets, placed in clusters rather than scattered. Red and green grapes, apple slices, pear slices, orange or orange segments, strawberries when in season, and light sprinkles of pomegranate seeds add colour without overpowering the board.
To enhance the ornament effect, tuck in small, eye-catching elements at even intervals. Dried cranberries work well as bright red accents. Cherry tomatoes, used sparingly, add shine and roundness that reads visually like ornaments. Foil-wrapped chocolate coins or small chocolate truffles can be nestled into gaps, especially where children are likely to reach. These details give the board its festive identity while remaining edible and integrated.

Image credit: Adobe Stock
Use herbs to sharpen the tree shape.
Fresh rosemary, thyme, or bay leaves can be placed along the outer edges or between layers to refine the outline and add a green note. Herbs also help fill any empty spaces without crowding the food.
Finish with a simple topper and trunk.
At the top, add an eye-catching focal point like you would on a Christmas tree. A star cut from a slice of cheese, a star-shaped cracker, or a single strawberry works well. For the trunk, place breadsticks, pretzel sticks, or rectangular slices of firm cheese directly beneath the base of the triangle. This small detail anchors the tree visually and completes the motif.
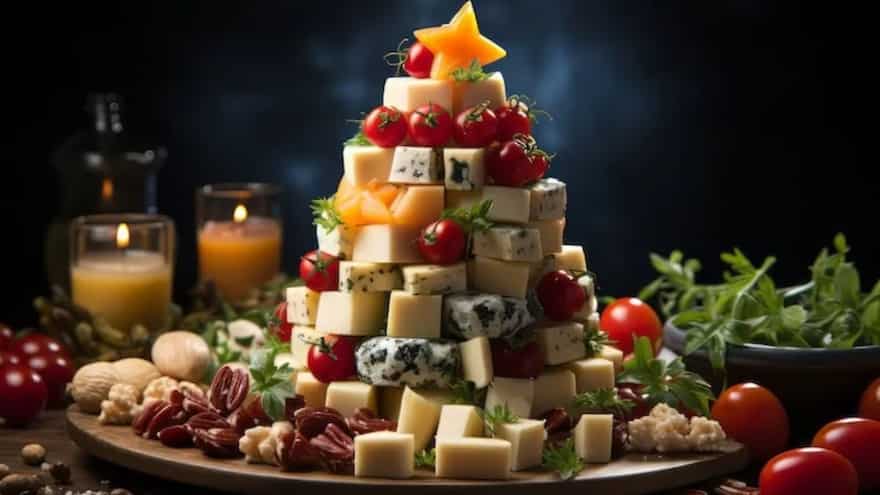
Image credit: Adobe Stock
Adding Meats To The Christmas Tree Cheese Board
Meats bring variation and visual contrast when used in small quantities. Two or three cured meats are enough to sit well alongside cheese and fruit without taking over the board. Choose thinly sliced meats such as prosciutto or serrano for soft folds, along with one firmer option like salami or bresaola. Stick to meats with straightforward seasoning so they sit easily with the rest of the board. Fold or roll the slices instead of laying them flat. Loose ribbons, half-folds, or small rosettes add height and shape, which helps the board look layered rather than flat.
Place meats slightly inside the cheese outline so the triangular form stays visible. Arrange them in short horizontal groupings that narrow as the board moves upward, and leave the top free for the finishing element. Spread meats across the board rather than keeping them in one section. Position meats near cheeses, crackers, or fruit that people naturally reach for together so the board flows easily for guests.
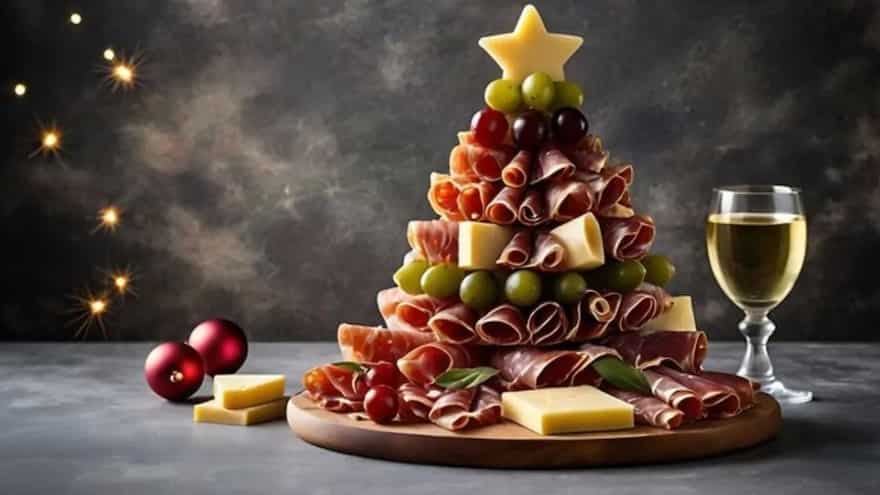
Image credit: Adobe Stock
Making It Work For Different Guests
For vegetarian gatherings, the board fits naturally with minimal adjustment. Adding extra fruit, nuts, and spreads works well for non-alcoholic settings. When children are part of the group, placing milder cheeses, chocolates, and familiar crackers closer to the edges makes the board welcoming for everyone.
Wines To Serve
A small, thoughtful wine selection complements the board well.
- Sparkling wine pairs well with soft and firm cheeses alike.
- Crisp white wines such as Sauvignon Blanc or Chenin Blanc suit fruit and creamy cheeses.
- Medium-bodied reds like Pinot Noir sit comfortably alongside aged and crumbly cheeses.
Serving two styles keeps the pairing flexible without overwhelming choice.


