


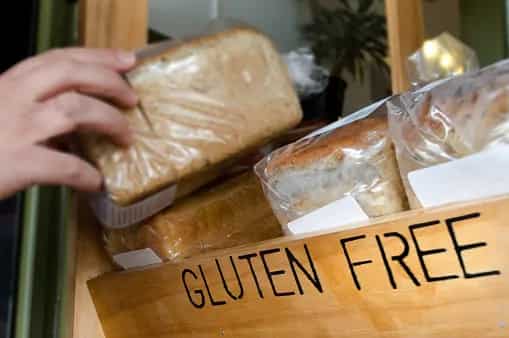
Gluten is one of the most contentious issues these days. It is a type of protein found in grains such as rye, wheat, and barley; it is so named because it has glue-like qualities and bonds the flour. Glue makes the dough stretchy and causes the bread to rise when baking. Not only that, but it also makes it chewy, providing a delightful eating experience. Gluten seemed to be in almost everything these days, whether it's pasta, beer, or even bread.
Some people may be gluten-intolerant because their small intestines cannot handle gluten, which can result in celiac disease. This disease can make you sick, causing bloating, headaches, diarrhoea, and even skin rashes. Many people are turning to gluten-free foods for these reasons. This includes picking gluten-free grains such as oats, sorghum, buckwheat, quinoa, amaranth, and even corn. So today's recipe is for gluten-free bread. This bread is made of buckwheat flour, brown rice flour, psyllium husk, and potato starch and is really tasty.
Ingredients-
• Brown rice flour, 90 gms
• Buckwheat flour, 130 gms
• Potato starch, 100 gms
• Active dried yeast, 2 1/2 tsp
• Caster sugar, 2 tbsp
• Apple cider vinegar, 2 tsp
• Sea salt, 1 1/2 tsp
• Psyllium husk, 20 gms
• Warm water, 400 ml
Method-
1. Use a small bowl to stir the yeast into activity. Combine yeast, sugar, and 150 ml of warm water for the same. Set away until foaming begins, which should take 10 to 15 minutes.
2. Next, combine 250 ml of warm water with the psyllium husk in another bowl.
3. Sift the salt, potato starch, brown rice flour, and buckwheat flour together. In a sizable basin, thoroughly combine them.
4. Combine the apple cider vinegar, psyllium husk gel, and activated yeast in the same bowl as the flour. All the ingredients should be well combined to get a dough-like consistency. The dough should next be kneaded for 5 to 10 minutes, and then set aside.
5. Next, grab a baking bowl and generously coat it with oil. Bring the dough to this basin, gently knead it there one more, and shape it into a little ball. For an hour, cover with a damp cloth, set aside, and allow it to rise to double its size.
6. At this point, place the risen dough on a lightly dusted surface and gently knead to form a tight ball. Make sure the ball is solid and free of cracks. Keep this dough aside once again for one additional hour in a warm location that is covered with a damp cloth. By doing so, the dough will be proofed.
7. At this point, preheat the oven to 250°C and set a cast-iron skillet on the middle shelf. After that, put a baking sheet on the oven's bottom rack.
8. After the dough has been proofed, remove the damp cloth and transfer it to a sheet of baking paper. At this point, you can decorate the top however you desire. Now. Remove the hot cast-iron pan from the oven and place the dough and baking paper inside. Add hot water to the baking pan with 5–6 ice cubes surrounding the dough in the meantime (between the baking paper and the skillet). The oven's door should be shut.
9. After 20 minutes of baking, take the baking tray with the water out and remove the bread. Bake it for a further 40 to 50 minutes at 230 degrees C after the first 20 minutes. With the shiny side up, you can wrap the bread in aluminium foil to stop it from getting darkly browned. After it is finished, remove the bread loaf and allow it to cool on a wire rack.
10. Your bread free of gluten is now ready. Keep in a cool, dry area for 3–4 days in an airtight container.


