


Concerns surrounding packaged ghee have intensified after the Bengaluru Police uncovered a large network circulating counterfeit. According to recent reports, more than 8,000 litres of adulterated Nandini ghee were seized after investigators found that cheaper fats had been blended into the product and packed in fake branded containers. The investigation revealed how easily the supply chain can be exploited when distributors, machinery, and packaging are replicated, making it difficult for consumers to judge purity based solely on appearance. Reports also noted that the racket operated across state lines and used legitimate-looking licences for distribution, raising questions about quality checks and monitoring in the commercial dairy segment.
All of this has prompted many households to reconsider a simple truth that homemade ghee is a more trustworthy option. Preparing it at home gives complete control over the source of butter, the heating process, and the final texture. There is no risk of blended fats, diluted stock or repackaged products entering your kitchen. It also allows you to make small, fresh batches instead of depending only on long-shelf-life options. For many families, homemade ghee proves to be cost-effective, customisable in aroma and colour, and far more reliable than market alternatives when purity becomes a concern. It is a straightforward, transparent method that restores confidence in what goes on your plate.
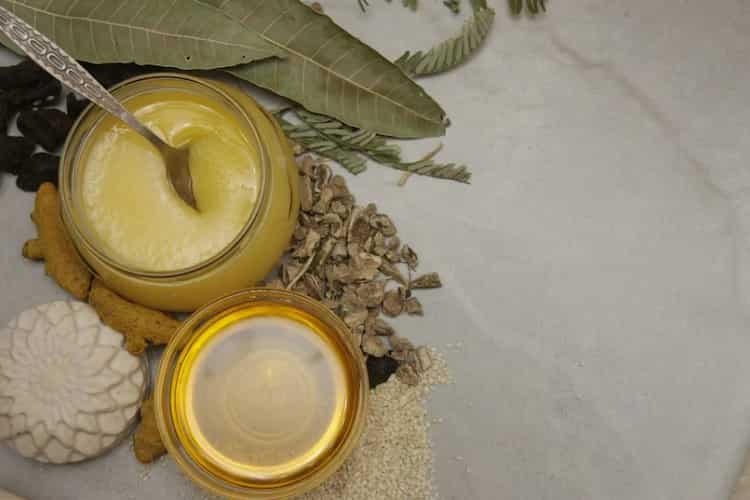
Step By Step Guide To Make Ghee At Home

(Image Credits: Adobe Stock)
Many people assume making ghee at home is complicated, but the process is actually simple and far easier than most kitchen tasks. It only requires patience, steady heat and a clean jar. Once you understand how butter separates and clarifies, the steps become almost automatic, allowing you to produce pure, reliable ghee without worrying about packaged alternatives.
Steps To Make Ghee At Home
- Choose fresh, unsalted butter because it melts cleanly and gives a better final aroma. Keeping it cold until the pan is ready helps it melt evenly.
- Place the butter in a heavy-bottomed pan. Use low to medium heat so it melts slowly without burning or foaming too quickly.
- As it heats, the butter forms a foam on top, a clear liquid in the middle, and milk solids at the bottom. Avoid stirring and allow the separation to occur naturally.
- Keep the heat low. The milk solids will turn light brown, and the liquid fat will become clear and golden. This is the stage where aroma deepens.
- Turn off the heat, let it settle, then strain through a clean cloth into a dry jar. Allow it to cool completely before sealing for storage.
5 Hacks To Make Pure Ghee At Home
(Image Credits: Adobe Stock)
1. Start With Frozen Butter For The Cleanest Separation
Using frozen butter may sound unusual, but it creates one of the cleanest clarifications you can get at home. When frozen butter hits gentle heat, it melts in slow vertical layers, almost like sheets dissolving one at a time. This slow release keeps the proteins from scattering, which means the milk solids settle neatly at the bottom instead of floating around. The process also prevents early browning, a common issue when the butter warms too quickly. As it melts gradually, you get more control over the point where the liquid turns clear and golden. The foam forms at a steady pace, giving you enough time to skim it lightly if needed. Frozen butter gives beginners a more predictable outcome because nothing happens suddenly.
2. Use A Wide Pan Instead Of A Deep Pot
Switching from a deep pot to a wider, shallow pan can dramatically improve the quality of homemade ghee. In a wide pan, heat spreads out rather than concentrating at the bottom, allowing the butter to melt evenly without hot spots. This encourages the milk solids to sink and brown slowly instead of burning in one corner. The wider surface also helps moisture evaporate efficiently, which speeds up clarification without increasing the flame. With less steam trapped, the foam forms gently and settles cleanly. It is easier to watch the colour change because the layer of liquid fat remains thinner and more transparent. This visibility helps you stop at the exact moment the ghee reaches peak clarity.

(Image Credits: Adobe Stock)
3. Let The Foam Rise Naturally Before Lowering The Heat
A lot of people immediately reduce the heat the moment the butter starts foaming, but letting the foam rise naturally for a few seconds improves how cleanly the ghee separates. The foam acts like a self-regulating layer that traps moisture and keeps the heat steady underneath. When you allow it to develop fully, the water evaporates more efficiently, helping the milk solids settle faster and more evenly. Once the foam reaches its peak, lowering the heat gently allows the butter to move into its clarifying phase without turbulence. This transition is smoother than starting on low heat from the beginning. As the foam thins out, the golden liquid becomes easier to monitor, and the solids brown at a controlled pace. This technique reduces cloudiness because you are working with cleaner layers throughout. It also prevents premature browning, giving your ghee a more refined aroma. The outcome is a clearer product with minimal supervision.
4. Use Visual Stages Instead Of Aroma To Track Doneness
First, the butter melts into three clear layers: foam on top, golden liquid below, and solids at the bottom. Next, the foam begins to thin as moisture escapes. The colour of the liquid fat slowly transitions from pale yellow to a deeper gold. Meanwhile, the milk solids turn from white to beige and finally soft brown. When the liquid becomes crystal-clear and the solids reach an even light-brown tone, the ghee is at its prime. Using colour instead of smell prevents overcooking, which can make the ghee taste sharp. This method gives you consistency across batches. Visual cues also help beginners understand how the process behaves, building confidence without relying on instinct alone.
5. Double-Strain For Extra Shelf Life And Smooth Texture
Double-straining might feel excessive, but it is one of the most effective ways to ensure long-lasting, pure ghee. After your first strain through a muslin cloth, let the ghee rest for ten minutes. During this short pause, tiny remaining particles settle at the bottom naturally. Then pass the ghee through a second fine cloth or a clean tea filter. This extra step removes the micro-particles that are too small to catch during the first filtration. Those tiny bits are what cause early spoilage, grainy texture, or uneven solidification. By removing them fully, you get ghee that stays smooth even after weeks of storage. It also prevents burnt flavours from developing over time.


