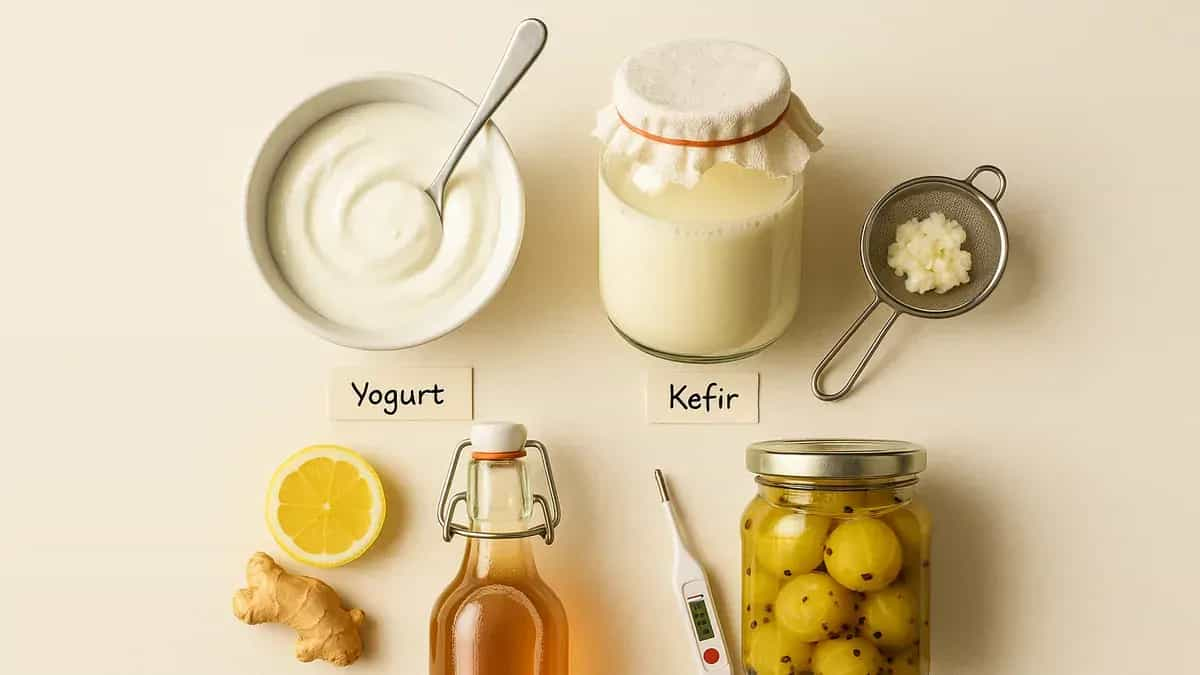
A jar can look still while it’s turning milk into yogurt, sweet tea into kombucha, and amla into something briny. Here’s how to make homemade probiotic foods safely—yogurt, milk kefir, kombucha, and fermented amla—with minimal equipment and clear “keep vs discard” checkpoints.
Safety-first promise + the simple fermentation framework
For beginners who want low-cost, minimal-equipment ferments—no probiotic-count promises, no lab gear. You’ll repeat the same flow each time:
Setup (clean) → Mix/Inoculate → Ferment → Check → Store
Non-negotiables
- Clean hands, jars, lids, spoons, strainers. Soap + hot water; air-dry.
- Avoid reactive metals (aluminium/copper) for acidic or long ferments. Stainless steel is fine for brief stirring/straining.
- Use the right cover: cloth for kombucha; for brines, a loose lid (or airlock) so gas can escape.
Temperature reality: work in ranges. Season and room temp change timing—trust smell/texture/visual checkpoints more than the clock.
Discard rules (do not taste—discard immediately):
- Fuzzy mold or colored spots/films (green/blue/black/pink/orange)—e.g., fuzzy green/blue patches on kombucha.
- Rotten/meaty smell (not clean sour).
- Slimy/ropey texture where it doesn’t belong.
- A sealed bottle that’s dangerously over-pressurized (rock-hard and you can’t vent safely), or a jar overflow where contamination is unclear.
Medical note: if you’re pregnant, immunocompromised, or managing GI conditions, check with your clinician. Otherwise, start small and watch tolerance.
Homemade Yogurt (reliable starter ferment)
Warm milk + a spoon of live culture + an undisturbed rest—until it sets and smells gently tangy.
You’ll need: milk (cow or buffalo), plain live-culture yogurt (starter), pot + spoon, clean containers, thermometer (optional), and an incubation option (oven light, insulated casserole, or towel wrap).
Step-by-step (with ranges)
- Heat milk: 82–90°C (180–194°F) for a few minutes (avoid a hard rolling boil).
- Cool: 40–45°C (104–113°F).
- Add starter: 1–2 tbsp per 1 litre. Loosen starter with a little warm milk, then stir in.
- Incubate undisturbed: 6–10 hours.
- Refrigerate once set.
Checkpoints (what “done” looks like)
- Set/jiggle: it tilts as one mass with a slight wobble.
- Aroma: clean lactic tang.
- Whey: a little clear/yellow whey is usually normal—pour off or stir back.
Common issues + fixes
- Runny: inoculated too hot/too cool, incubated too short, or starter was weak. Aim for 40–45°C and use fresh plain starter.
- Grainy: overheated milk or the pot/jar got moved while setting. Heat gently; don’t disturb.
- Too sour: too warm/too long. Shorten incubation or use a cooler spot.
Storage + starter reuse
- Fridge ~5–7 days for best quality.
- Save starter early: a few tablespoons from day 1–2 of a fresh batch.
- Reuse for a few generations; refresh if it stops setting or flavour drifts.
Milk Kefir (fast daily ferment with grains)
Kefir “grains” aren’t cereal—they’re living clusters (they often look like soft cauliflower). Treat them gently and they’ll keep producing.
You’ll need: kefir grains, milk (cow or buffalo), clean glass jar, breathable cover (cloth/coffee filter) or loose lid, and a strainer (plastic/nylon, or brief stainless use).
Step-by-step (with ranges)
- Add grains to milk: about 1 tbsp grains per 500 ml milk.
- Ferment: 12–24 hours at 18–26°C.
- Strain (catch the grains).
- Restart grains in fresh milk.
- Refrigerate strained kefir (it keeps fermenting slowly).
Checkpoints (what’s normal)
- Taste: tangy; light fizz can happen.
- Separation: curds/whey layers are common—stir or shake to recombine.
Grain care (simple)
- Avoid frequent rinsing (can stress grains).
- Short break (few days): grains in fresh milk in the fridge.
- Longer break: refrigerate and change milk about weekly.
Troubleshooting essentials
- Sluggish: cold room, too much milk, or adapting grains. Use less milk, go longer, or move slightly warmer.
- Over-fermented: very thick/sour, heavy separation. Next batch: more milk, less time, or cooler.
Want to estimate macros (protein/sugar) for yogurt or kefir—without implying probiotic counts? Try /nutrimeter.
Kombucha (beginner-friendly checkpoints for F1 + optional F2)
Kombucha is sweet tea that turns tart. Key beginner rule: yeast is usually stringy and brown; mold is dry/fuzzy and often colored.
You’ll need: plain black/green tea (avoid flavored/oily teas), sugar, SCOBY (pellicle) plus starter tea (unflavored kombucha), clean glass jar, cloth cover + rubber band, and bottles for F2 (only if carbonating).
Step-by-step F1 (primary fermentation)
- Brew sweet tea: dissolve sugar while hot. Use 50–80 g sugar per 1 litre.
- Cool completely to room temp.
- Add starter + SCOBY: 10–20% starter tea by volume (tart-smelling/tasting), then SCOBY.
- Cover with cloth.
- Ferment: typically 7–14 days.
- Taste checkpoint: only if there are no red flags. Start around day 5–7: sweet → balanced sweet-tart → tart.
What’s normal (don’t panic)
- Brown strings/blobs (yeast) and sediment.
- A new pellicle on top (often thin/patchy at first).
Safety + troubleshooting (mold vs yeast)
- Yeast: brown strings, wet sludge, floaty bits under the surface.
- Mold: dry/fuzzy growth; often green/blue/black, sometimes pink/orange.
If you see fuzzy mold or any pink/orange film, discard the entire batch and SCOBY. Don’t taste; don’t scrape.
Kombucha varies with temperature and starter strength—if your results are confusing, post a photo + timeline in /community.
Optional F2 (carbonation + flavor, keep it controlled)
- Bottle: use pressure-safe bottles. Leave 2–3 cm headspace.
- Flavor lightly: ginger + lemon or apple + a pinch of cinnamon.
- Ferment: 1–3 days at room temp.
- Control pressure: burp carefully (open slowly over a sink) and refrigerate once fizzy.
Fermented Amla (simple brine ferment, culturally relevant)
Amla starts tight and tannic. In brine, it softens and turns pleasantly sharp. One rule matters: keep every piece submerged.
Choose and prep: firm, unbruised amla; wash and dry completely. Keep whole or chopped; if chopping, use a clean knife/board.
Primary method: salted brine ferment (with ranges)
- Make brine: 2–3% salt (20–30 g salt per 1 litre).
- Pack jar: add amla to a clean glass jar, leaving headspace.
- Pour brine to cover: everything fully submerged.
- Weigh it down: fermentation weight or a small clean glass bowl/weight.
- Ferment: room temp 3–7 days.
- Daily checks: bubbles, clean souring aroma, and confirm it stays submerged.
If you notice a thin, matte white film (often called kahm yeast), be cautious: it’s often not dangerous, but easy to confuse with early mold. Only skim and continue if you’re confident it’s not fuzzy and there’s no color; if unsure, discard.
Alternative mention only: some families do “naturally soured” amla without measured brine; for beginners, brine is more predictable.
How to use + store
- When tangy to your taste, refrigerate.
- Eat small portions with dal-rice, curd rice, chopped into salads/chaat, or stirred into plain curd (avoid treating it like medicine).
Routine, portions, and storage (make it sustainable)
Start with one ferment, get a repeatable result, then add another. For ideas beyond “health shots,” explore /food-trails.
A simple beginner routine (flexible)
- Start with one: yogurt (most reliable) or kefir (fast daily).
- Repeat 2–3 times until you can hit the same texture/taste in your kitchen.
- Then add amla.
- Add kombucha when you’re ready to leave a jar undisturbed for 1–2 weeks.
Portions (tolerance matters)
Start with 2–4 tablespoons of any new fermented food/drink per day, then increase gradually if you feel fine. If you notice gas/bloating, reduce or pause, then restart smaller.
Storage + labeling (prevent mix-ups)
Label jars/bottles with date + batch + starter source.
- Yogurt: fridge ~5–7 days.
- Milk kefir (strained): fridge ~5–7 days; grains can rest in milk.
- Kombucha: F1 room temp 7–14 days; once bottled and refrigerated, drink within ~1–3 weeks.
- Fermented amla: refrigerate when tangy; finish within ~2–4 weeks.
Conclusion
Start with one homemade probiotic food this week—yogurt or kefir—until it becomes repeatable. Label your jars, taste gradually, and let the safety rules decide: fuzz, odd colors, rotten smell, or a bottle you can’t vent safely = discard, don’t taste.
Explore everyday ways to use your ferments (raita-style bowls, smoothies, dressings, fermented sides): /discover/recipes.
Some parts of this article were created with AI assistance.