


EGGLESS: Swedish Lussebullar or Lussekatter or Saffransbullar Recipe
Recipe By Anamika Banerjee
#Bread 🍞
Another favourite of mine, the most delectable, easiest and quickest, healthiest way to enjoy the entire Baking Process
These are the traditional Swedish Saffron Buns/Rolls that they meticulously prepare during their Christmas or Easters Time or in their any other big religious occasions par-say & is the most delectable, decadent & gorgeous looking Buns in the world made with the world’s most expensive key spice ingredient- which’s the SAFFRON...💁♀️
0
0 Rating -
Rate

Vegdiet
2hr total
2hr total

plan
Bookmark
ingredients serve
serve1
Add to Shopping ListIngredients for EGGLESS: Swedish Lussebullar or Lussekatter or Saffransbullar Recipe
- 0.17 cups 2 Cups
- 1/50 tsp Salt
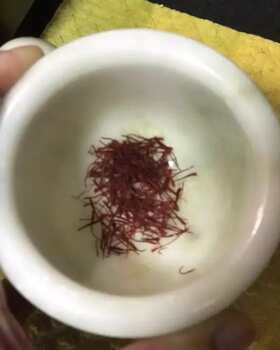
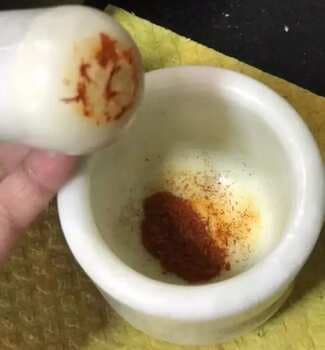
- 0.08 gm Saffron Strands: Ground
- 1/50 cup Warm Water: Lukewarm
- 0.17 tsps Instant yeast
- 0.17 tbsps 2-2.5 tbsps Sug
- 0.08 tsp Cardamom Powder: This isn’t used traditionally
- 1/50 tbsp 1/4Cup
- 1/50 cup Raisins: Used as the Garnish
- 1/50 cup 1/4 Cup
- 0.08 tbsps 1-2 tbsps
- 0.08 g 1-2 Baking
- As Required Preheat the oven at
Directions: Eggless: Swedish Lussebullar Or Lussekatter Or Saffransbullar Recipe
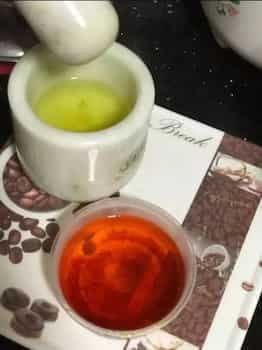
- STEP 1.First Up: In a mortal-pestle- Ground the measured Saffron Strands into almost a fine powder (You needn’t be quite specific to that, roughly ground will also do), Pour it out in a separate bowl & mix it with some hot/warm water to release its finest aroma and gorgeous colours- Set Aside
- STEP 2.Prepare the very Yeast mixture: I’mein not reiterating on the same process- Just that, you need to follow the measurements & proportions very strictly, aforementioned- Cover it for about 5-8 mins time to let it bloom perfectly to be mixed with our rest other dry ingredients altogether
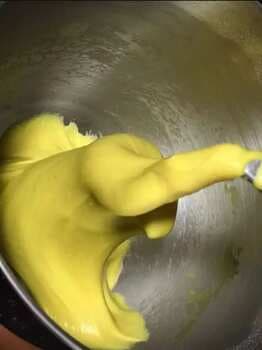
- STEP 3.All the aforesaid measured dry ingredients need be well sifted, before it’s mixed up with the wet ones (Be any)- Now, in a large mixing bowl: Add in all the dry ingredients together, roughly mix up with a wooden spoon or spatula- Then, leaving the same use either your washed & clean hands or the stand mixer to knead it well
- STEP 4.Kneading should continue for at least 15-20 mins in the stand mixer or by hands that’s even more to upto 30-35 mins. The key point for a softest, fluffiest & delicious gorgeous looking & tasted breads are in its proper kneading & the elasticity that’s formed due to the same
- STEP 5.We can well understand the same: Once the dough is not sticking to our hands nor the surface, it’s quite elastic & isn’t tearing apart when stretched long & when stretched enough- The fingers should be visible underneath the same, transparent yet not easily torn anyway- This is known as the WINDOW-PANE TEST
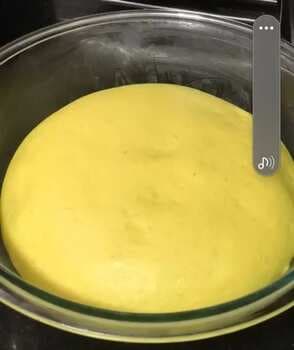
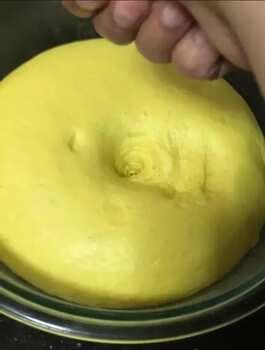
- STEP 6.Let it sit, covered in its 1st proofing for at least 60-75 mins time (VVI), before starting to work with it any further…Once, the 1st proofing period is over now, uncover it, punch it out to degas and then take it out on the flour dusted work station or clean platform
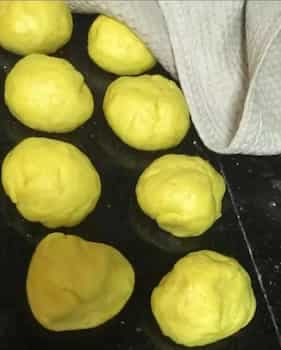
- STEP 7.Knead it for about a minute or so- Divide it into its desirable pieces (as how big/small you want your Buns to be), Make them into desired Roundels- Cover it up again to rest it for a mini proofing period of 15-20 mins time
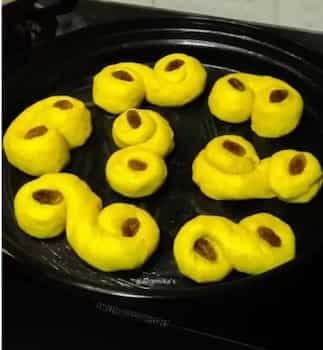
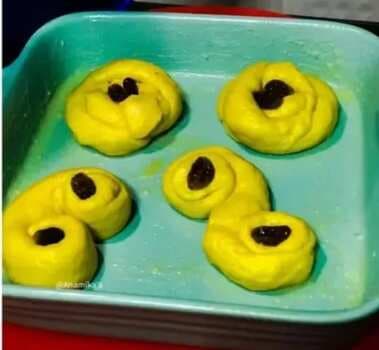
- STEP 8.Now, is the time to shape them up accordingly: As it’s traditionally done (There can be quite a few shapes, that are done traditionally), finally garnish them with the raisins (as shown in the pics shred), give them all their 1st Milk-Butter-Honey Wash & again, Cover back & let them rest for their last & final proofing for at least 60 mins time, a little more is always better though
- STEP 9.Post shaping the Buns & before the final proofing done: That’s how, they should look like in their Pre-Baking stage
- STEP 10.Bake them in a preheated oven at 200C for just not more than 10-12 mins time (adjust accordingly to your own oven temperature settings, emulating the time I’ve mentioned herein), as for me it usually works wonders in & around 10-11 mins time, perfectly
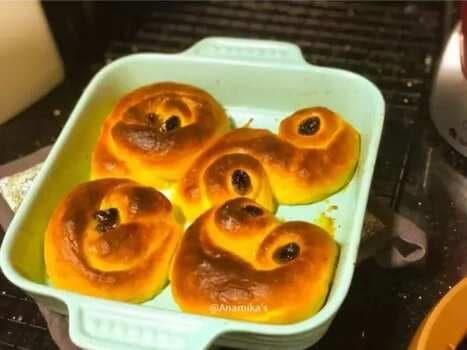
- STEP 11.These are the ones & that’s how they look like in their Post-Baking stage….& just before their final touches, with some melted butter wash & before the servings
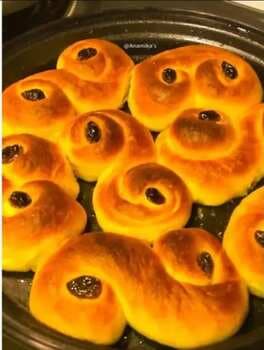
- STEP 12.Post-Baking looks of these decadent, gorgeous looking- softest and the fluffiest Buns of all…with all their Final Touches & garnishing now, simply awaiting to be grabbed in just no time
- STEP 13.That’s how it makes your gorgeous, Meal Supper or even the Breakfast of the day- Super Sumptuous
- STEP 14.Enjoy....💁♀️😋😍


Nutrition
value
value
11
calories per serving
< 1 g Fat< 1 g Protein2 g Carbs< 1 g FiberOther
Current Totals
- Fat< 1g
- Protein< 1g
- Carbs2g
- Fiber< 1g
MacroNutrients
- Carbs2g
- Protein< 1g
- Fiber< 1g
Fats
- Fat< 1g
Vitamins & Minerals
- Calcium4mg
- Iron< 1mg
- Vitamin A< 1mcg
- Vitamin B1< 1mg
- Vitamin B2< 1mg
- Vitamin B3< 1mg
- Vitamin B6< 1mg
- Vitamin B91mcg
- Vitamin B120mcg
- Vitamin C< 1mg
- Vitamin E< 1mg
- Copper< 1mcg
- Magnesium2mg
- Manganese< 1mg
- Phosphorus3mg
- Selenium< 1mcg
- Zinc< 1mg
Percent Daily Values are based on a 2000 calorie diet. All nutritional information presented are estimates and not meant to substitute professional dietary advice or treatment
Recipe available on Loading... community profile
Recipe By Anamika Banerjee